Prerequisites #
- You must have the latest version of LearnDash or LifterLMS installed. We don’t recommend trying to import/export from previous versions.
- You must also have a backup. While a backup is not required like anything that involves data, you should ensure you have a full backup so you can revert should the worst happen.
- Be sure to have the most up-to-date version of Transfer installed on both export and import sites.
- Our development team recommends the following server settings at a minimum to prevent time-out errors:
- post_max_size: 256MB
- upload_max_filesize: 256MB
- memory_limit: 512MB
- max_input_time: 600
- max_execution_time: 600
- max_input_vars: 2000
- Your server limits must be larger than your export file, otherwise, you will experience issues with migration.
- Before importing, check again that you have the latest version of the Transfer installed on your destination site, disable caching plugins, and allow file writing permissions.
- Be sure to add your new site to your Honors WP Dashboard. To do this, go to your Purchase History > View Licenses > Manage Sites, then add your new site.
Disclaimer #
If you experience time-out issues or other internal server errors, these must be addressed via your hosting provider. If you have a large amount of LMS content to migrate, this will require more memory.
Import Source #
From your WordPress admin area, navigate to Transfer > Import to begin uploading your courses and associated content.
There are three methods you can utilize to upload your exported LearnDash or LifterLMS courses and associated content.
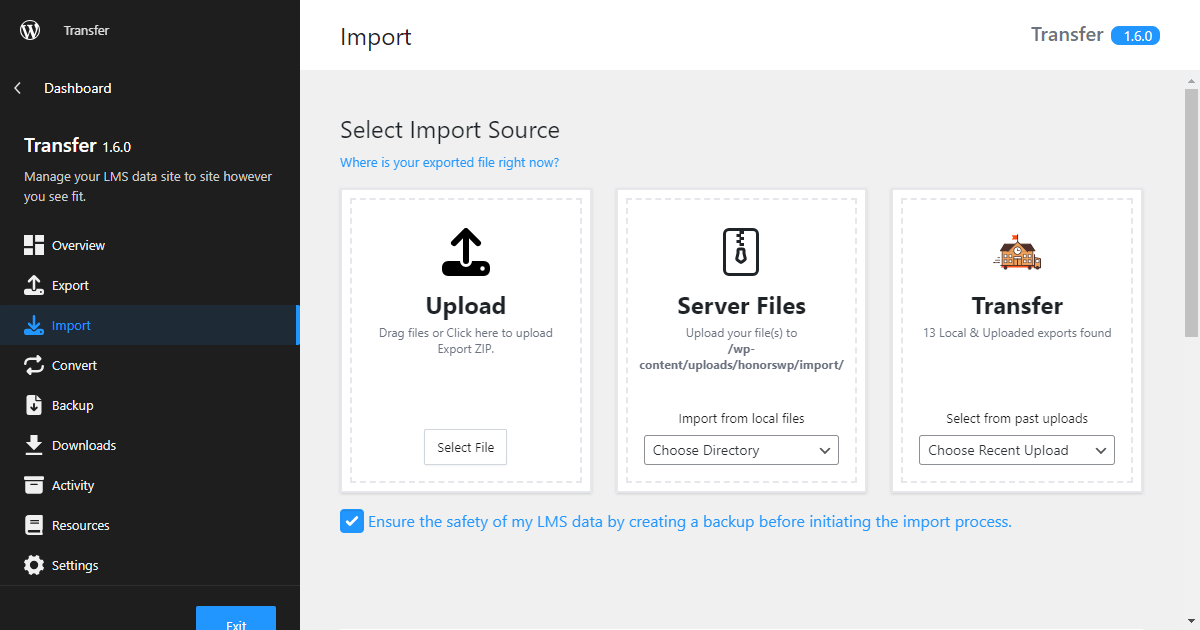
You can upload the zipped export file you previously downloaded, upload via the directory, /wp-content/uploads/honorswp/import directory, or import a previously uploaded file.
If your site’s post_max_size and upload_max_filesize are less than the size of your exported zip file, then you will need to upload your export file via the directory.
Upload via JSON File #
When you upload your LearnDash or LifterLMS content via JSON, you must be uploading a zip file. If in the export process, the zip didn’t generate and instead, you downloaded a folder, you’ll need to zip that before uploading.
First, locate the exported JSON file you wish to upload.
Backup Creation #
Check the box if you want Transfer to create an automatic backup before uploading your LMS data.
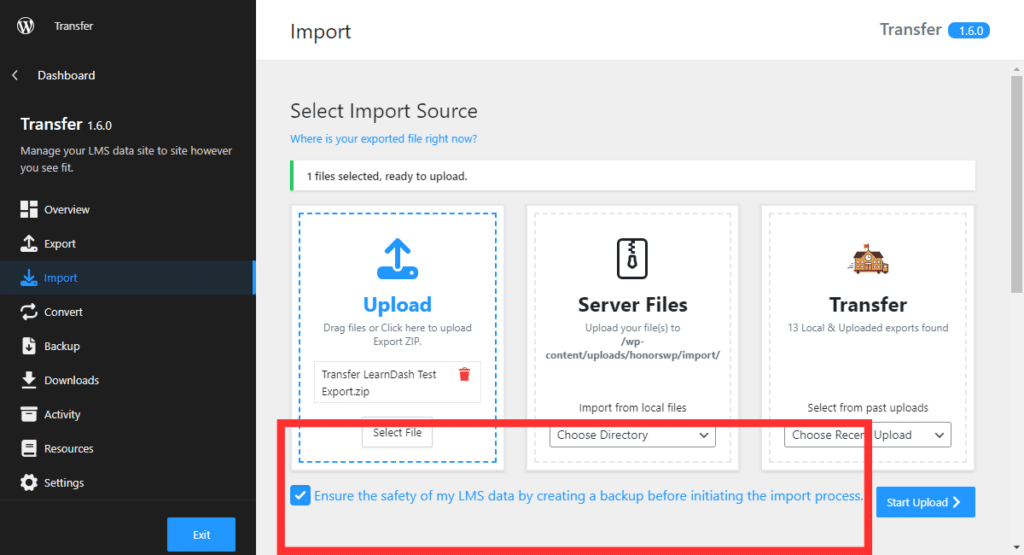
Next, click Select File under the Upload section.
Finally, click Start Upload to run the upload process.
The screen will show your LMS data was uploaded to Transfer. This is because we are uploading the LMS data into an agnostic table in the event the data needs to be converted into a different LMS platform. If you are migrating data to the same LMS platform, we will still upload it into the agnostic table.
Once the upload has been completed, you will see a pop-up window indicating the file was uploaded successfully.
Next, click Start Backup to begin the backup process of the data you just uploaded. If you do not want wish to create a backup, there will be a Continue button.
Click Continue after the backup process has been completed.
You will then be prompted with a screen allowing you to customize the courses, content, & users before importing.
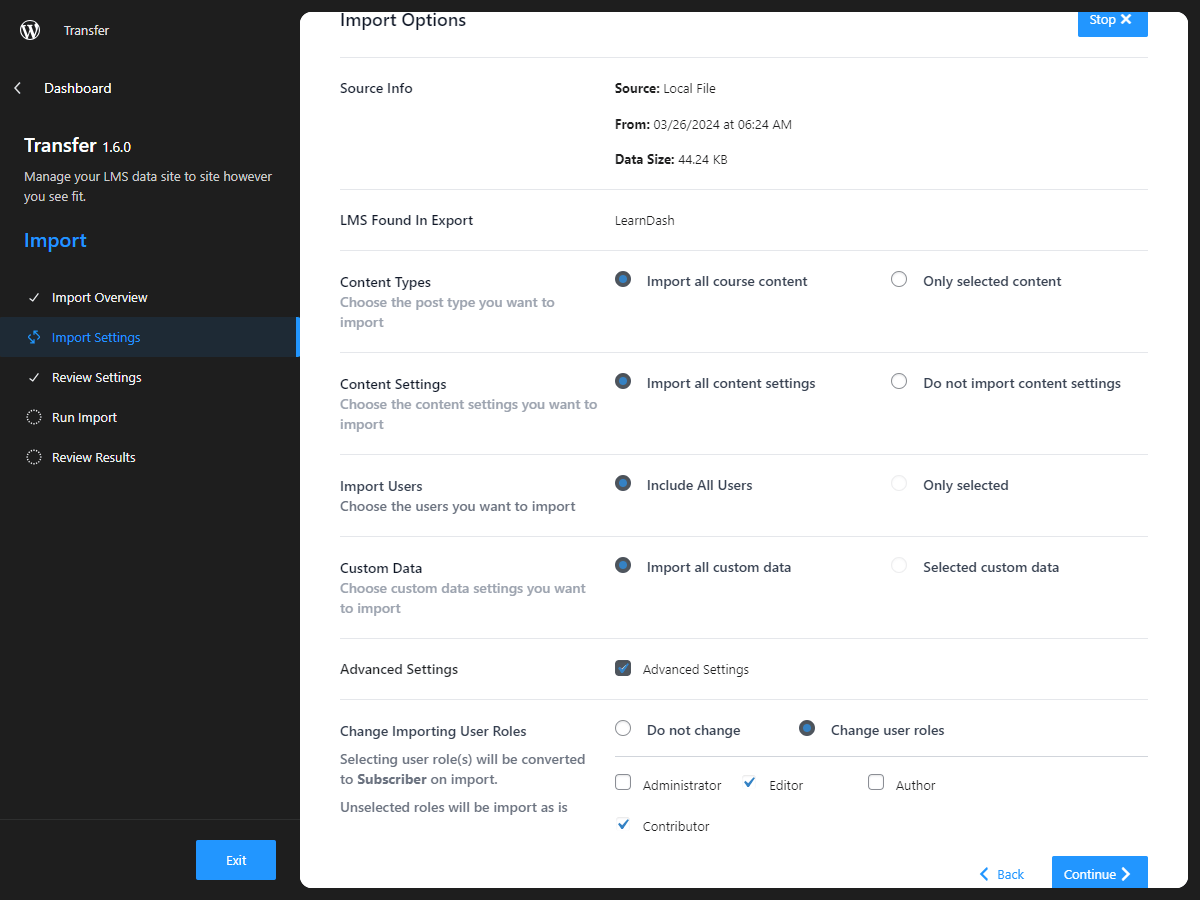
Upon making your selections and clicking Continue, you can review what you plan to import.
Click Run Import to begin importing your data.
After the import process has been completed, click View Results to verify your data was imported correctly.
Click Done to return to the Overview menu, or View Activity to be taken to the Activities menu.
Import via File Directory #
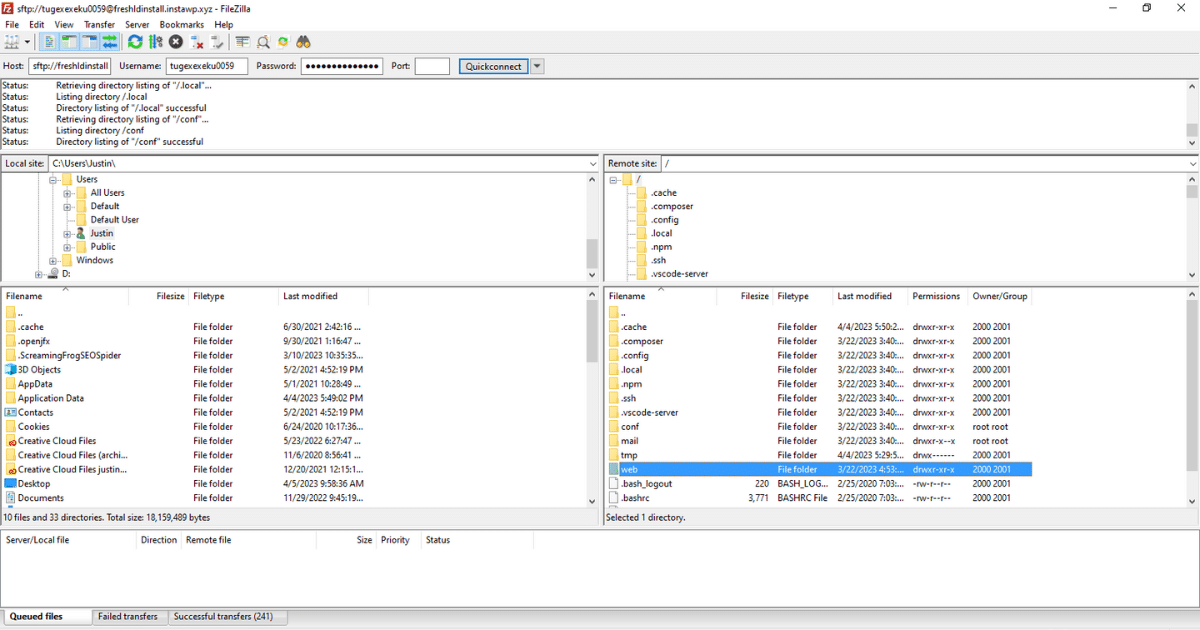
To upload the exported folder via the “Read directory from uploads” method, you must use an FTP server such as FileZilla.
First, you must unzip the exported folder before adding it to the uploads folder in your FTP client.
Next, take the unzipped export folder, and in your FTP server, navigate to the import folder.
To get to the import folder, navigate through the folders as follows: web > [name of your site] > public_html > wp-content > uploads > honorswp > import.
The import directory will not exist automatically. You will need to create the directory.
To do this (using FileZilla in this case), right-click when you have reached the folder /public_html/wp-content/uploads and select Create directory.
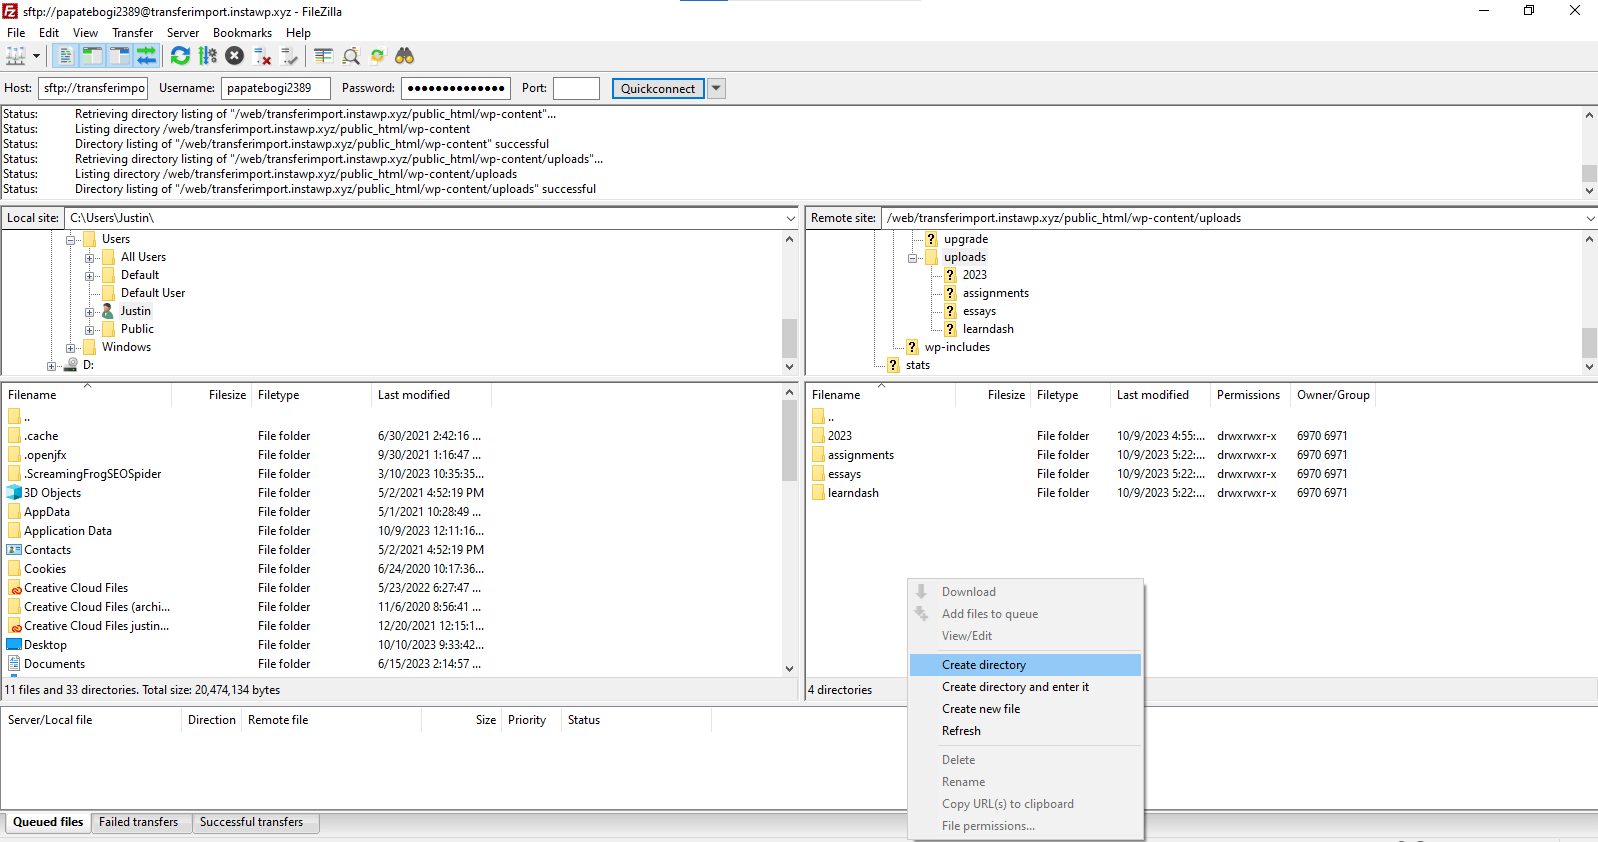
Name this folder, /public_html/wp-content/uploads/honorswp/import.
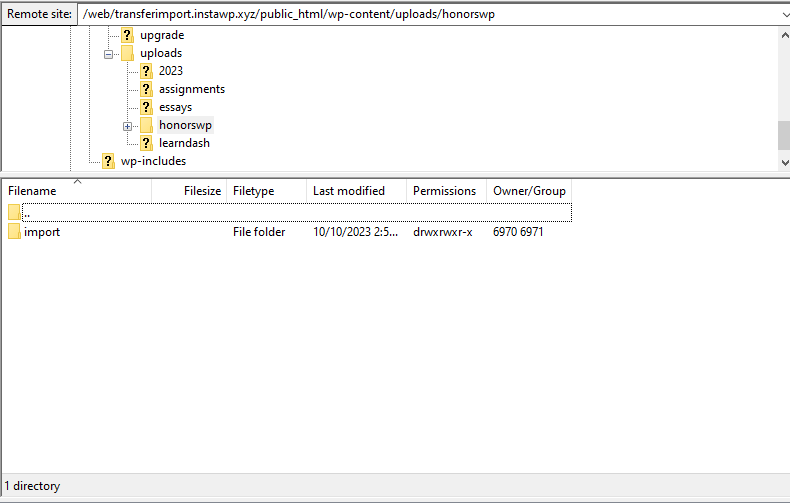
Next, add the unzipped export folder to the import folder.
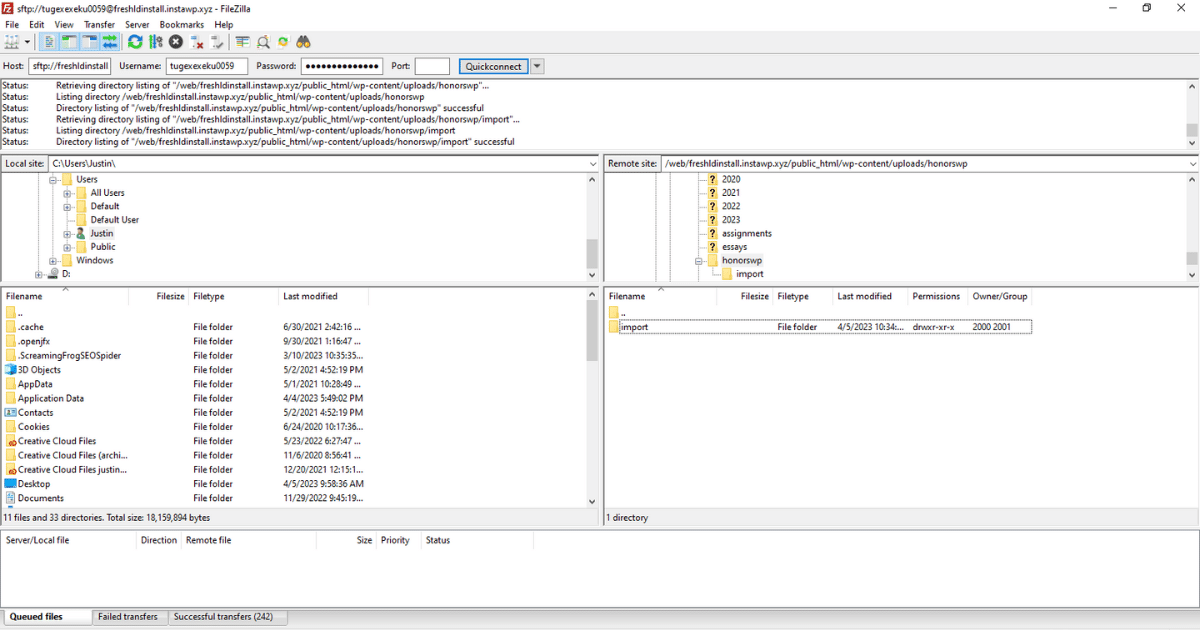
After you have added the unzipped export folder to the import folder in your FTP client, return to the Transfer menu and navigate to the Import menu.
Select the local directory folder and click Start Upload. You will then follow the steps outlined above.
If the folder does not appear, then refresh the page, as the folder may still need to be retrieved.
Import via Recent Uploads #
If you have previously uploaded an export file, but did not complete the import process, you can select the file via the past uploads area.
When you have made your selection, continue with the same steps as before to complete the import process.
Import Troubleshooting #
Import Process Does Not Finish #
If you receive an error before the import process starts that reads “Could not create directory“, you must enable file writing permissions on your site.
If the import process times out, it is likely your server parameters are too low.
We recommend these server parameters at a minimum for a successful migration:
- post_max_size: 256MB
- upload_max_filesize: 256MB
- memory_limit: 512MB
- max_input_time: 600
- max_execution_time: 600
- max_input_vars: 2000
If your server parameters are lower than your export file size, you will likely experience time-out errors.
Do Not Start Multiple Import Processes #
Do not start multiple import processes. If you notice the process has not progressed after some time, you will want to utilize the Resume function. Multiple import processes will cause further time-out issues.
Resume Import #
If the import process gets stuck and does not progress after some time, you have the option to resume the process.
To resume an import process that has stopped, there are two ways you could do this:
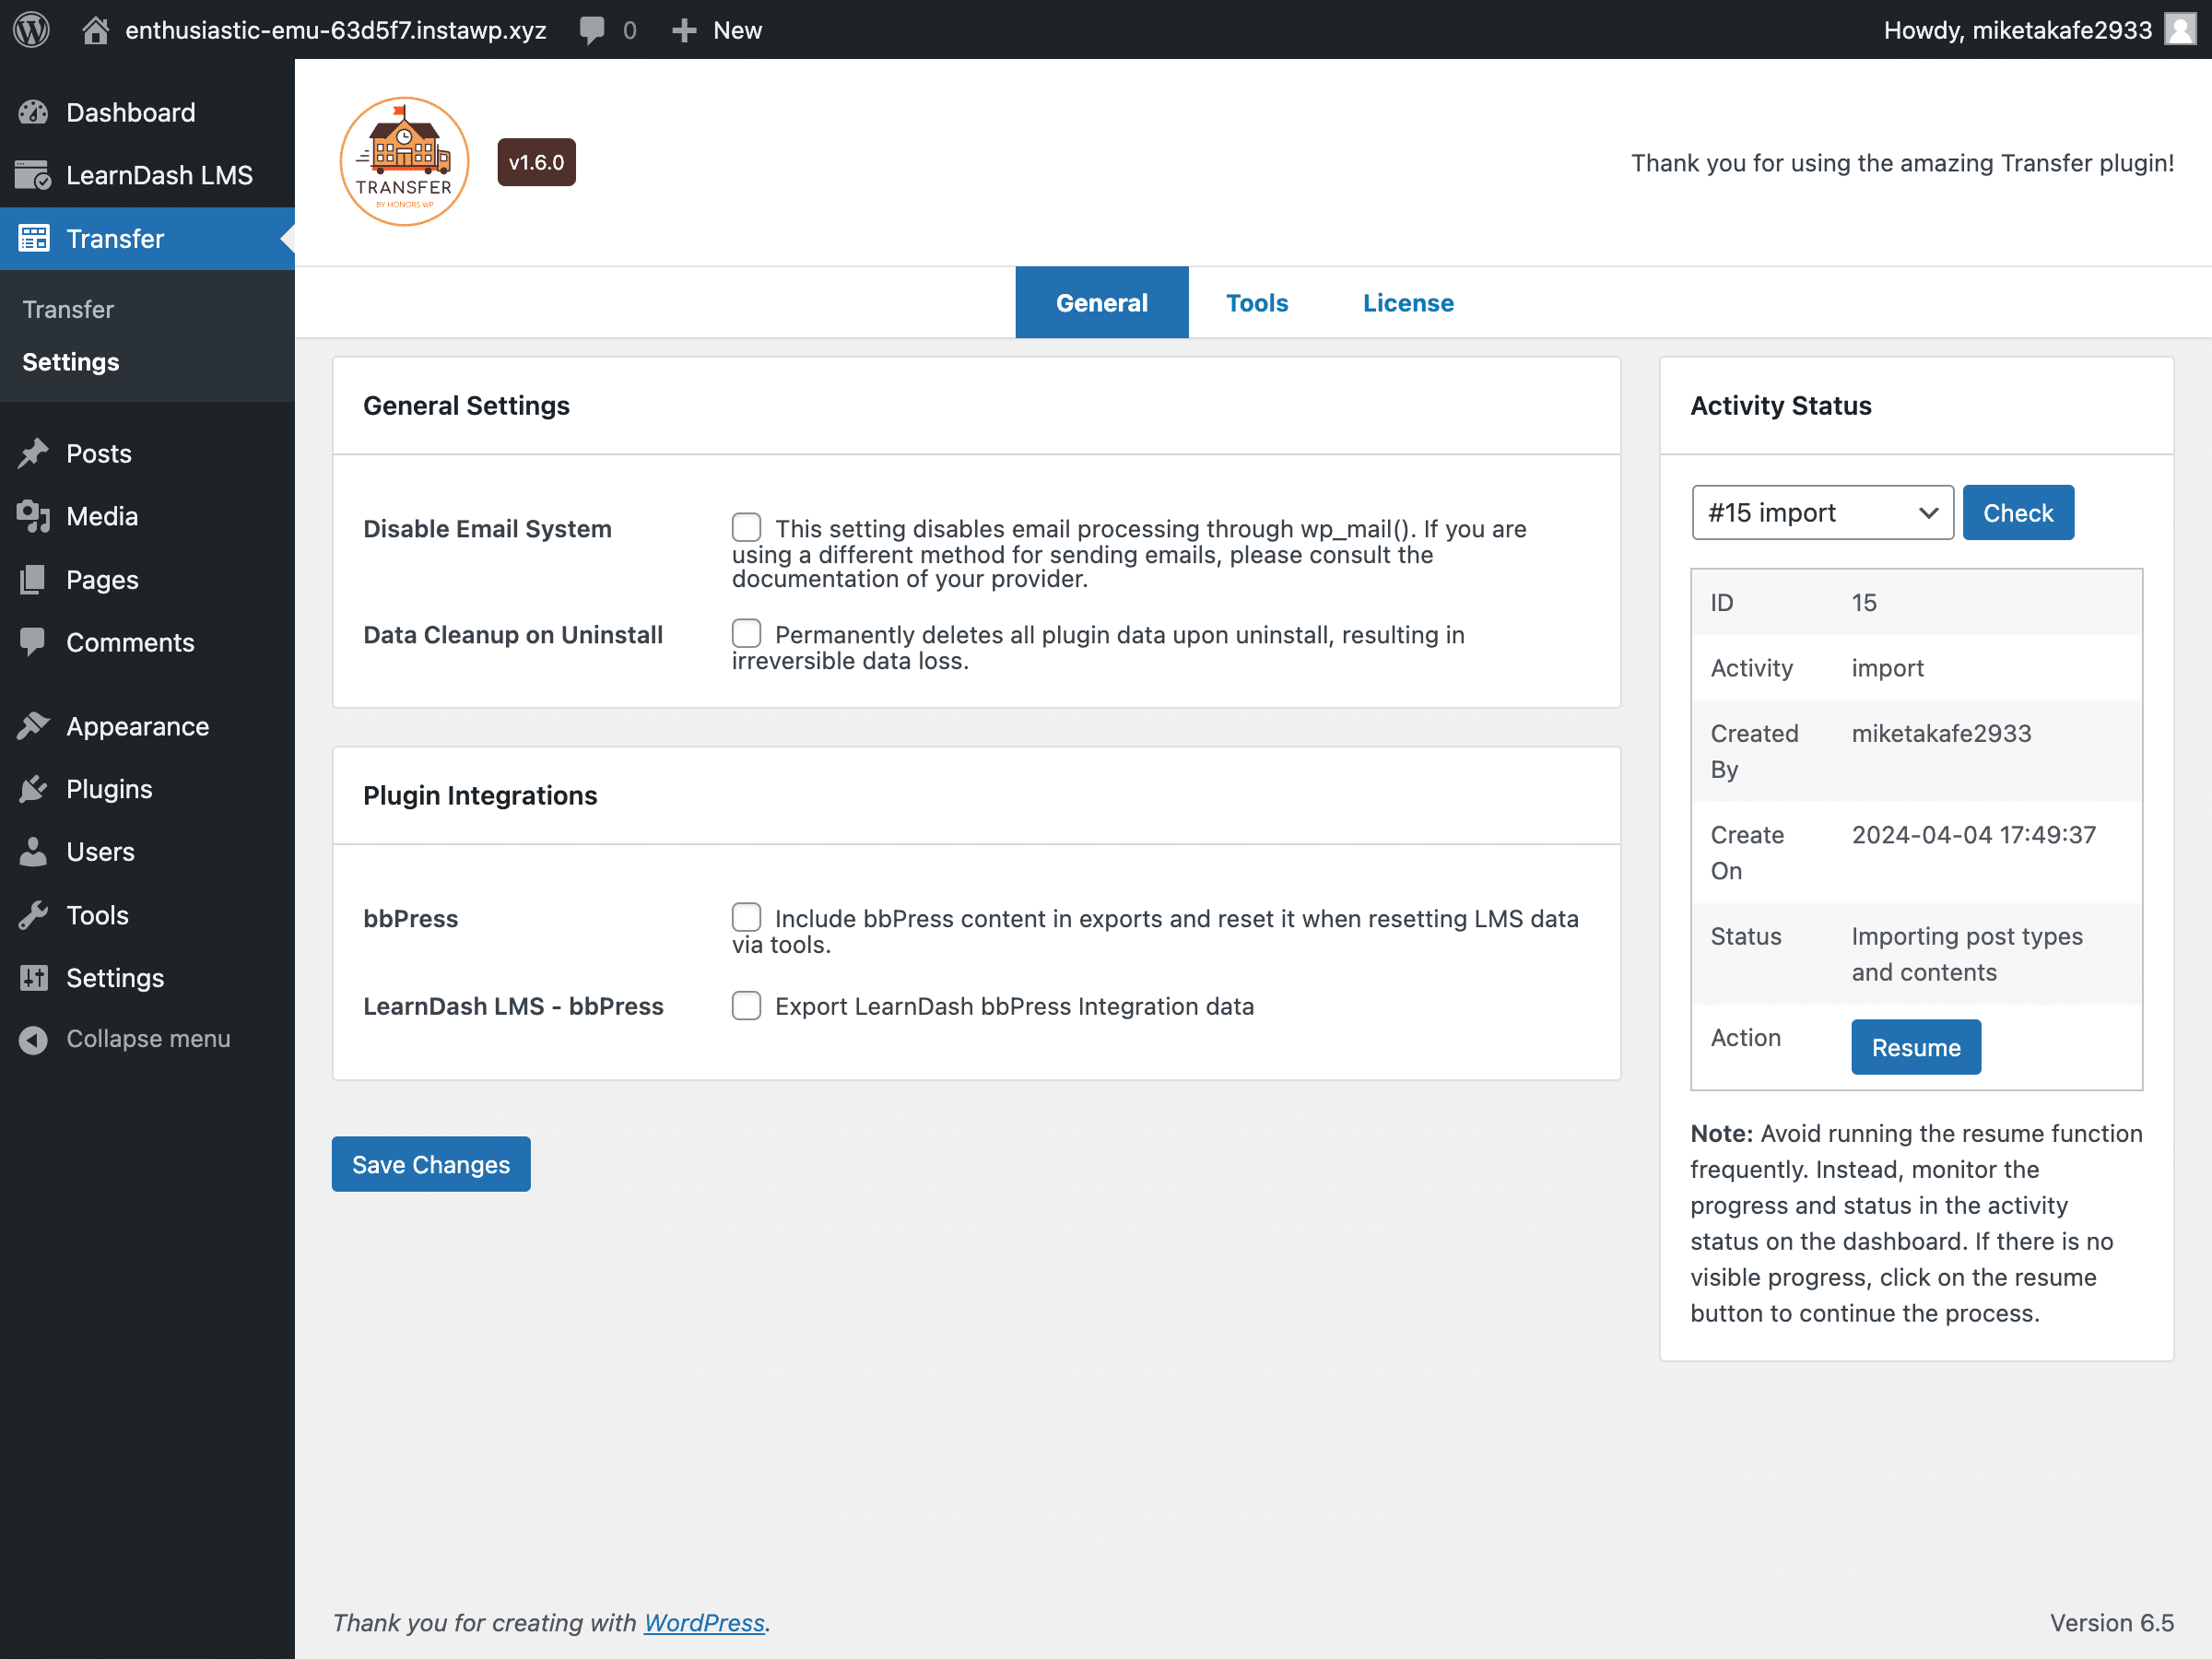
The first is you can navigate from your WordPress admin area to Transfer > Settings. Under the General tab, you will see an Activity Status drop-down menu. Then, select the most recent import action. There should be the option to Resume the process.
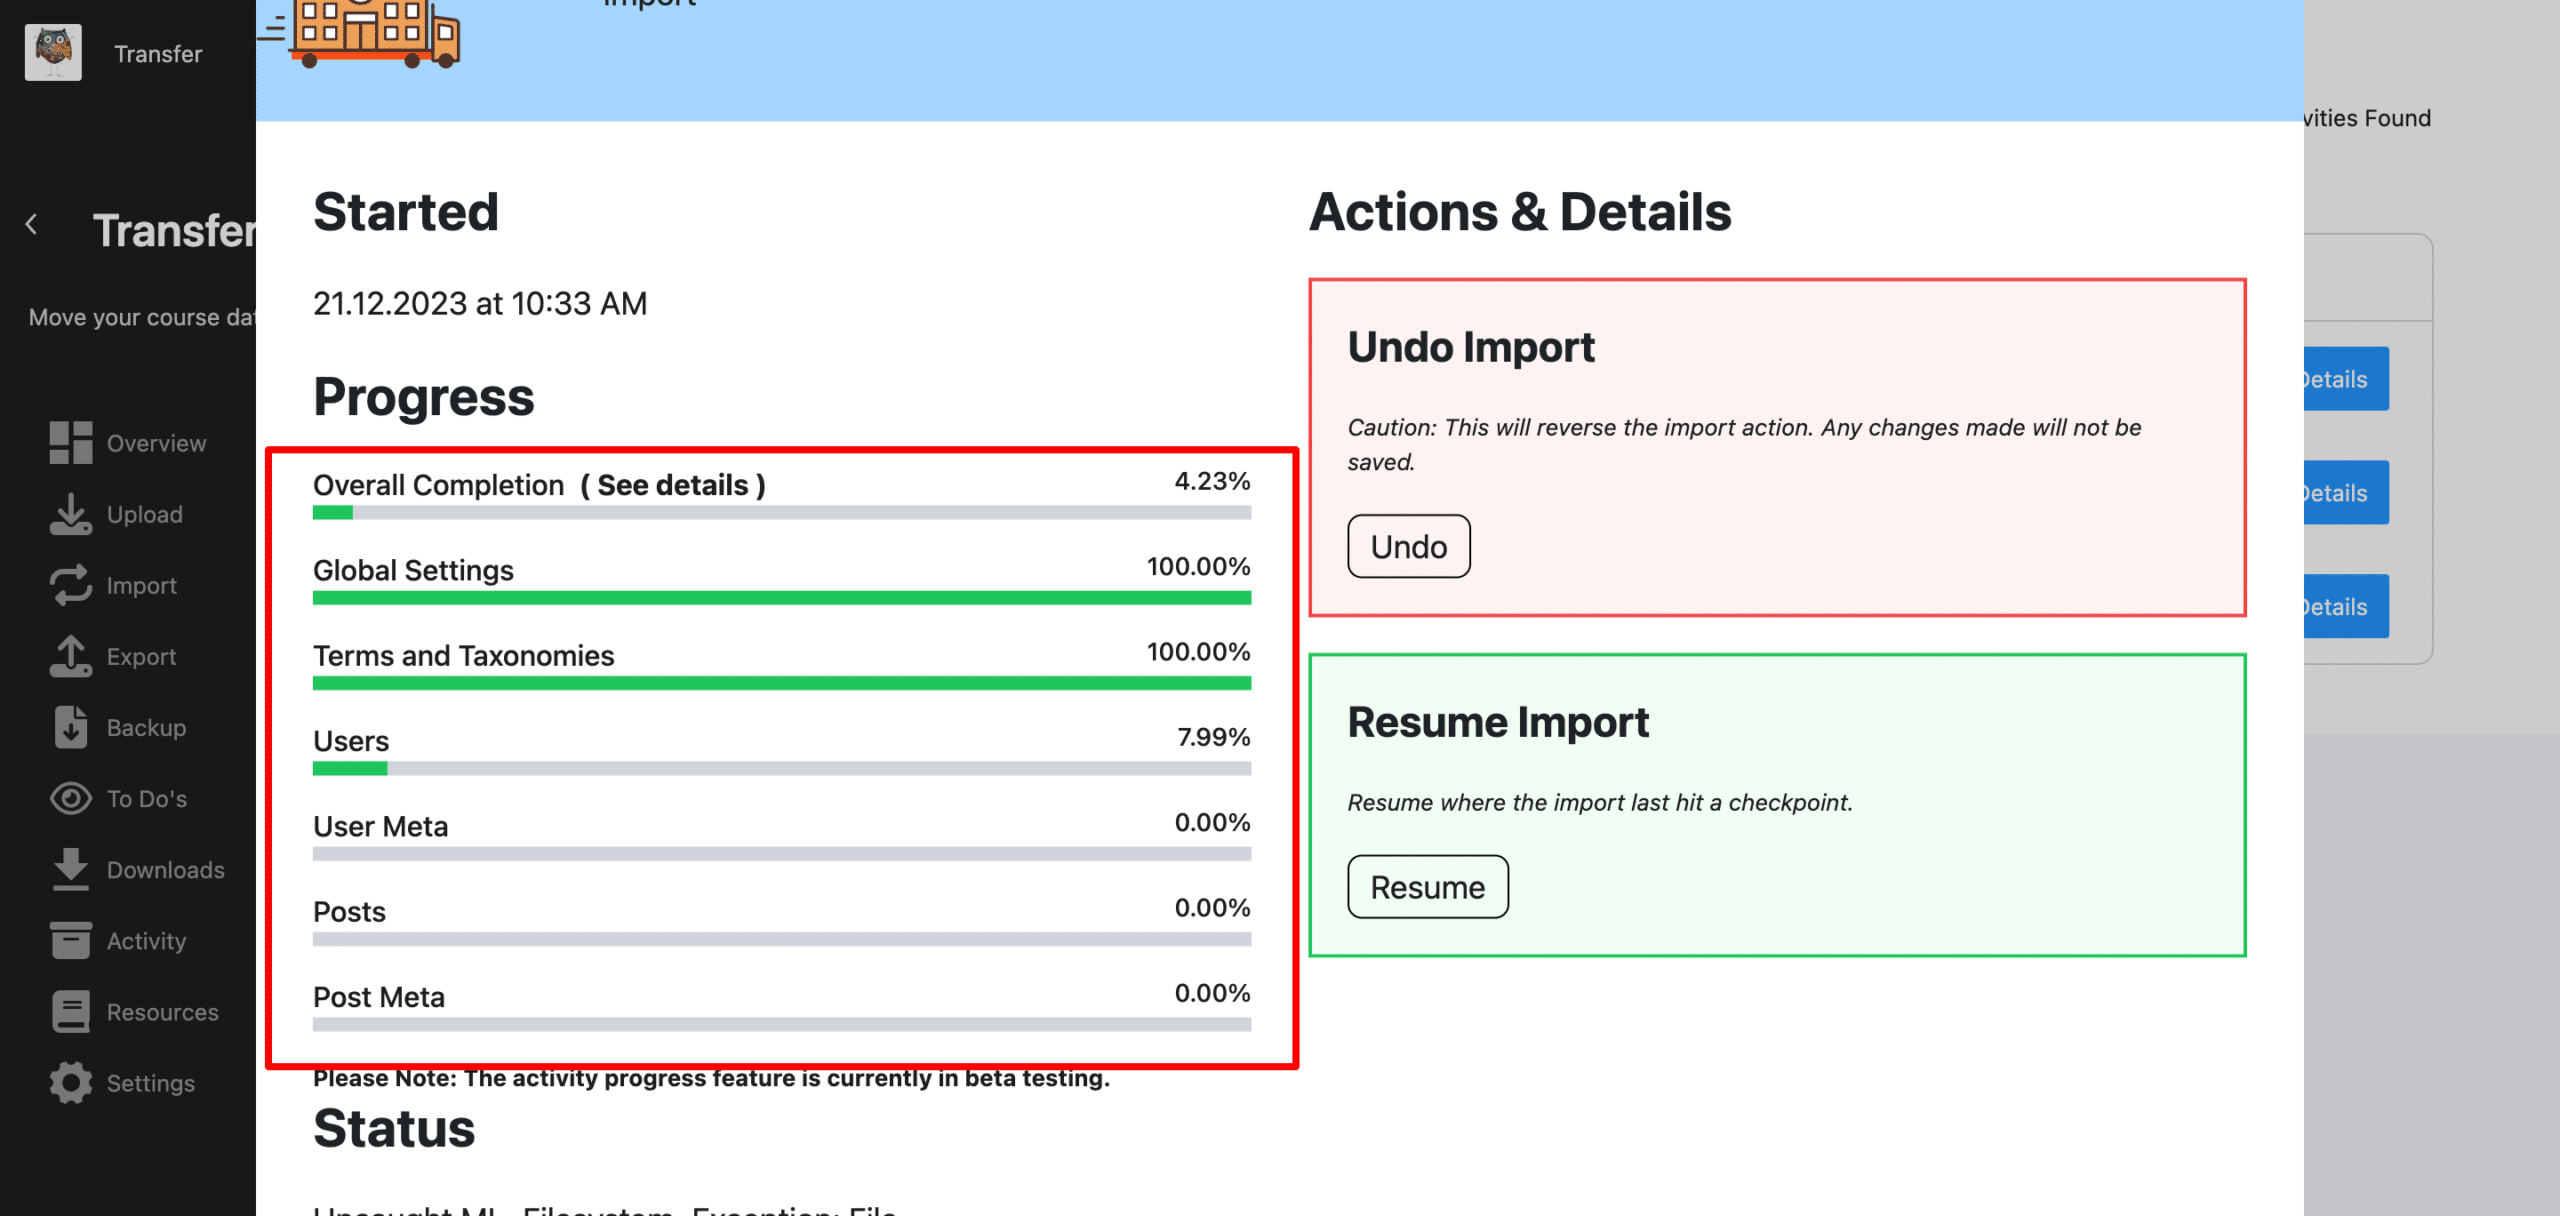
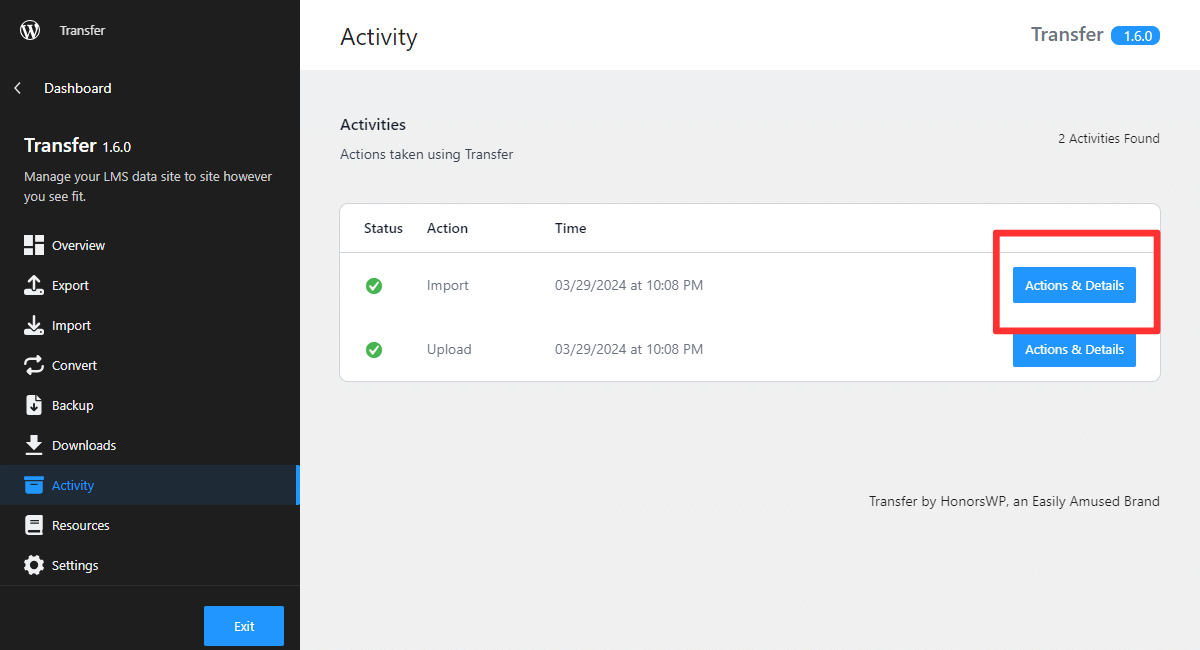
Alternatively, navigate to the Transfer Overview menu > Activity. Under the most recent import activity/action, click Actions & Details. There, you should see the option to resume the import process.
LearnDash Quiz Questions Are Missing #
You must be using the LearnDash quiz question custom post type. If you are using the WPProQuiz post type, our plugin will not include those quiz questions in the export file.
Click here to read how to upgrade your quiz questions to the custom post type.
Imported Content Built with Elementor #
When using Elementor and your destination site URL did not change:
Follow the steps outlined in this Elementor article:
- Go to Elementor > Tools > Replace URL Tab
- Enter your old-url and your new-url and click Replace URL
- Under the General Tab > Regenerate CSS, click Regenerate Files
- In Settings > General on your WordPress Dashboard, make sure that the URLs are similar.
Media Library Contents Not Migrated #
Only media that is related to LearnDash or LifterLMS is migrated using Transfer. Media library content is not included except featured images for courses. To move all contents in your media library, take the wp-content folder and import that to your new site.
Theme/Template Issue #
If your import stalls during the posts process, your template path may be preventing the process from finishing.
You will want to check via your template path and be sure the correct paths are established.
Below is an example of what you would want your template paths to look like on a LearnDash site:

If you are using a child theme or your theme has other customizations, revert to the default WordPress theme to migrate your courses, content, & users, then you can switch back to the theme you wish to use.
Refer to our Troubleshooting documentation for more.
Undo Import #
If something happens during the import process, you have the option to undo the import function.
To undo an import, navigate to the Activities menu.
Next, under the Import action, click Actions & Details.
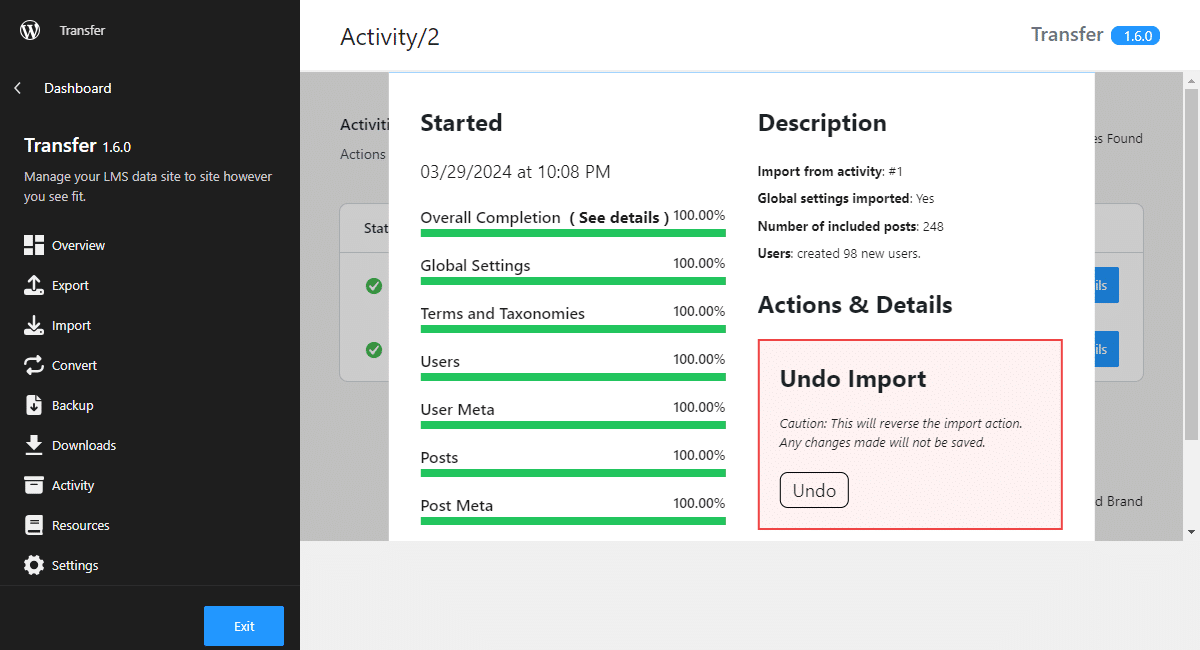
Then, click Undo Import to undo the import process. Note that this will reverse the import action and any changes made will not be saved.
Disable the Automatic Backup Function #
Disable Automatic Backup During Import/Conversion
This code snippet prevents the automatic backup of your site’s LMS data during the import/conversion processes. This is intended to optimize the execution of the conversion by avoiding unnecessary time consumption on backup operations when not required.
Instructions:
- Insert this code in the functions.php file of your active WordPress theme.
- By implementing this code, the execution time for import and conversion can be optimized.
// Prevent automatic backup before conversion
remove_action( 'ea_transfer_init_learndash_import', 'ea_transfer_auto_backup_before_convert' );
remove_action( 'ea_transfer_init_lifter_import', 'ea_transfer_auto_backup_before_convert' );
remove_action( 'ea_transfer_init_lifter_to_learndash_convert', 'ea_transfer_auto_backup_before_convert' );
remove_action( 'ea_transfer_init_learndash_to_lifter_convert', 'ea_transfer_auto_backup_before_convert' );


