Install & Activate the Messaging Plugin #
First, you’ll need to purchase the Messaging for LearnDash plugin. After purchasing, you’ll receive a .zip file to download.
Next, you’ll need to install the plugin. The Messaging for LearnDash plugin can be downloaded directly from your Honors WP Dashboard. Once the plugin file is downloaded to your local system, you can add it to your LearnDash site.
Here’s a step-by-step guide on how to do it:
- Log in to your WordPress admin dashboard.
- Navigate to the ‘Plugins’ section in the left-hand menu and click on ‘Add New’.
- On the ‘Add Plugins’ page, you’ll see an ‘Upload Plugin’ button at the top. Click on it.
- Now, choose the downloaded plugin file from your computer and upload it.
- After uploading, you’ll see an ‘Install Now’ button. Click on it to install the plugin.
Once the plugin is installed, it’s time to activate it. Here are the steps to activate the plugin:
- After the installation, you’ll see a message that the plugin installed successfully. In this message, there will be an ‘Activate Plugin’ button. Click on it.
- If you miss the activation button in the message, you can still activate the plugin. Just go to the ‘Plugins’ section in your WordPress dashboard. You’ll see a list of all the plugins installed on your site.
- Locate ‘Messaging for LearnDash’ in the list and click on the ‘Activate’ link under it.
After these steps, your Messaging plugin will be activated and ready to use. The next step is to configure it according to your needs and preferences, for which you can follow the comprehensive user guide provided.
Visit our plugin installation documentation for more information.
Configure Plugin Settings #
The Messaging Settings page allows you to customize various aspects of the plugin to suit your needs. To access it, go to LearnDash LMS > Chat Settings in your WordPress dashboard.
General LearnDash Chat Settings #
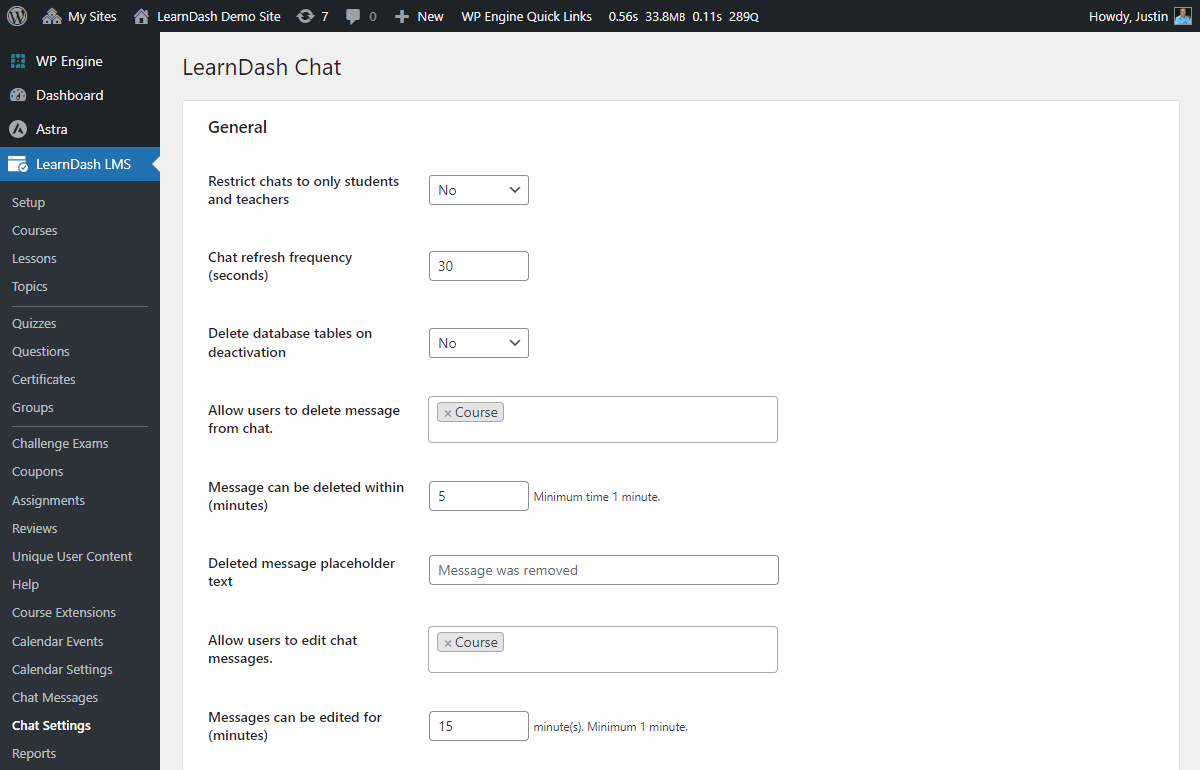
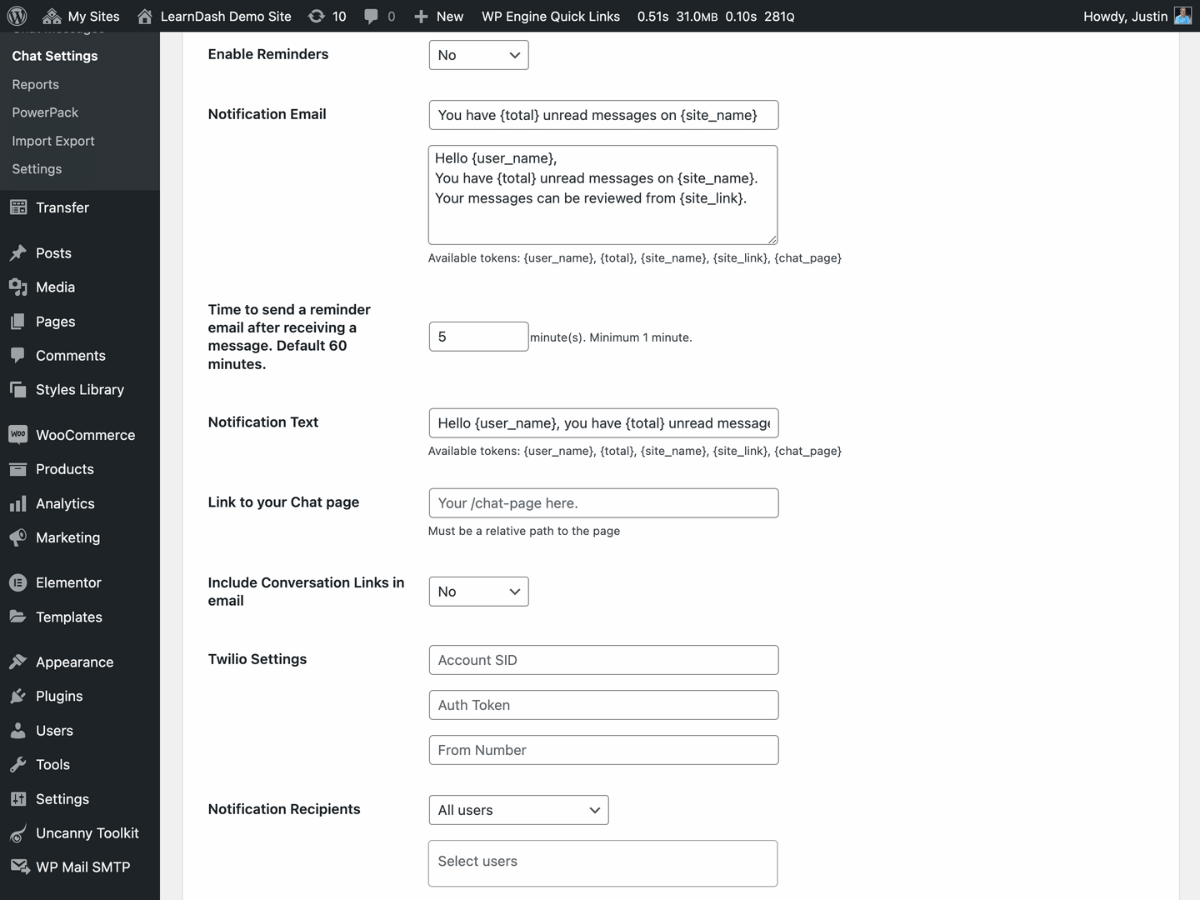
Reminders #
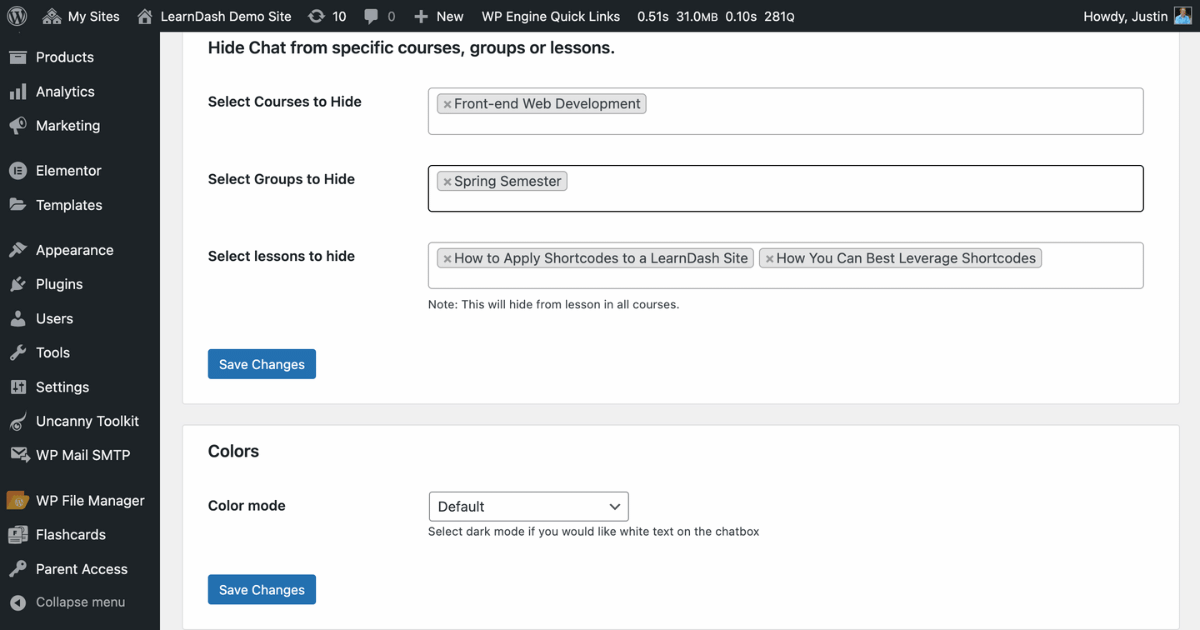
Hide Chat from Specific LearnDash Courses, LearnDash Groups, & Lessons #
Use the Hide Chat settings to hide the chat tab from specific LearnDash courses, groups, and lessons.
Messaging for LearnDash Shortcode #
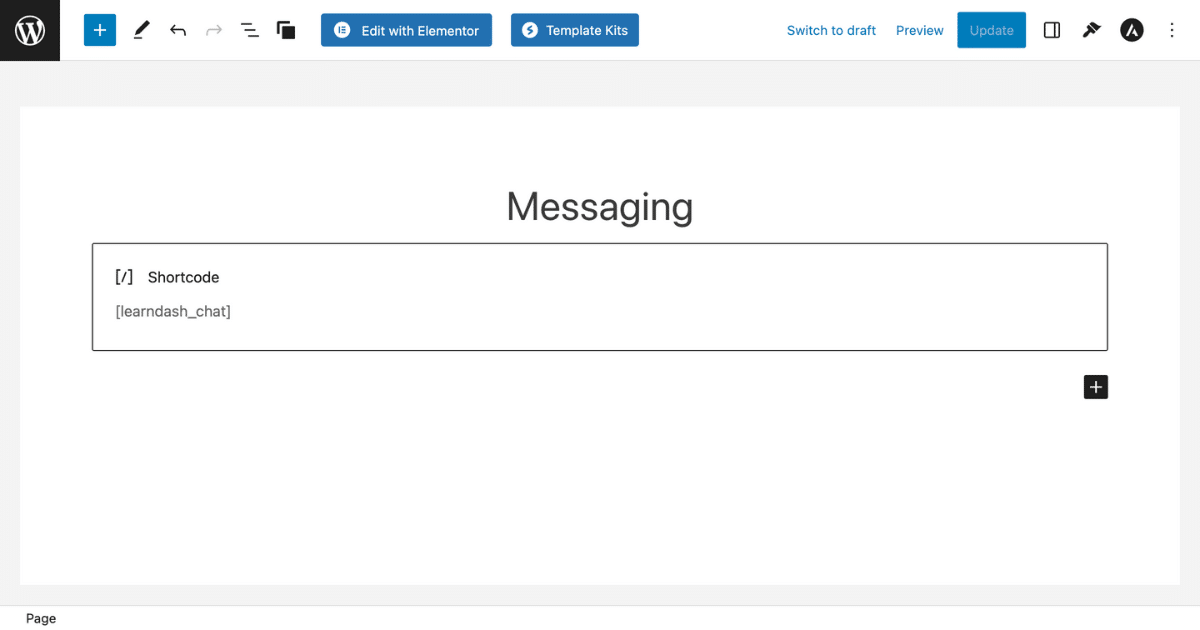
Apply the Messaging for LearnDash shortcode to display the chat window on any WordPress page or post.
[learndash_chat]Creating a Private Messaging Dashboard #
A private messaging dashboard is a central place where users can send and receive messages. Here’s how to create one:
First, in your WordPress dashboard, click on “Pages” in the left menu, and then “Add New.”
Next, create a new page with a title such as, “Messaging Dashboard”.
Then, add the shortcode shown above to your WordPress page.
Click Publish, and your chat window should now appear.

How Users Can Chat #
Chat via LearnDash Courses #
Let’s say you’re a user enrolled in the LearnDash course, Basic Programming Concepts. The chat settings are currently set to Restrict chats to only students and teachers.
When a user logs on to your LearnDash site and navigates to the LearnDash course page, there will be a chat tab at the top.
Below is what a user would see on their course page with the Restrict chat setting set to Yes.
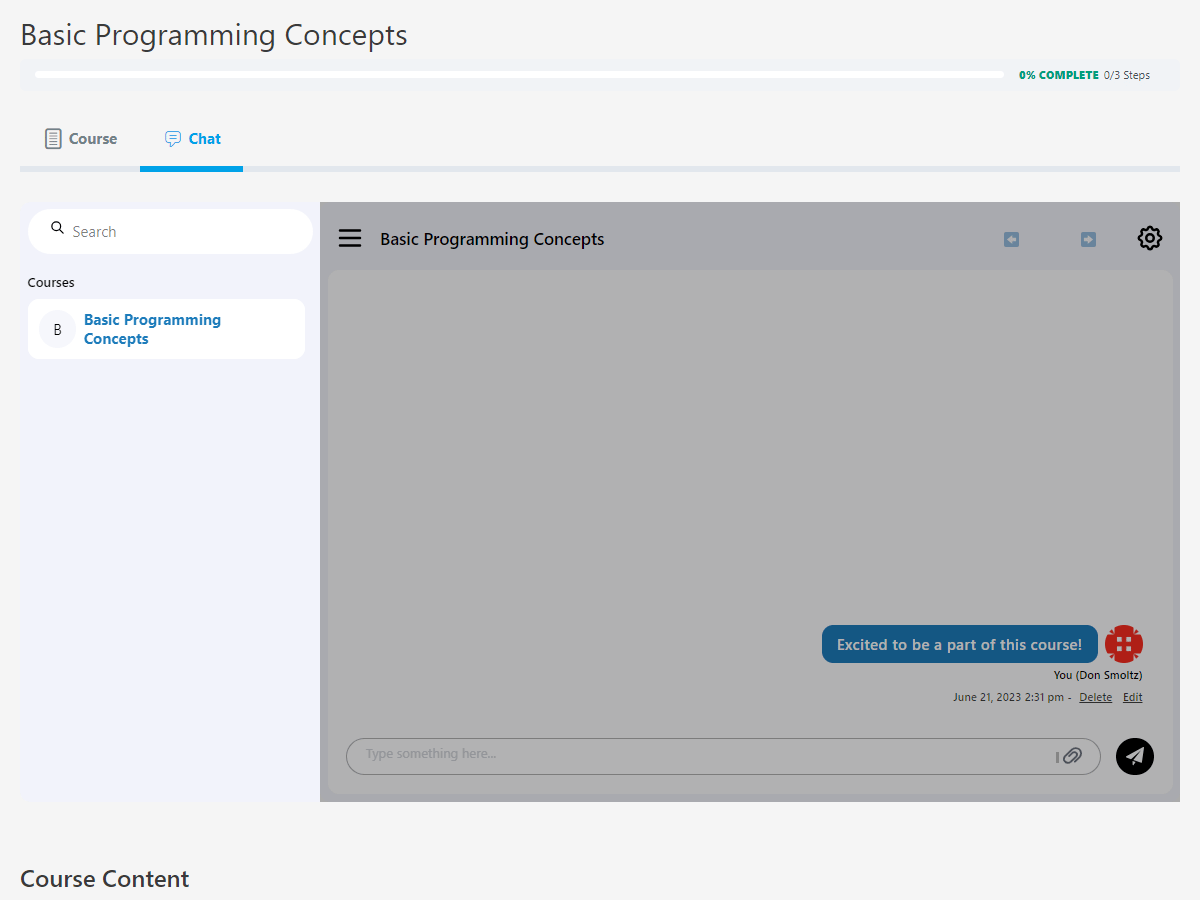
Here, the user can chat with the course instructor. The courses the user is enrolled in will appear in the side menu under Courses. So in this case, the user is only enrolled in Basic Programming Concepts, so that is the only course that shows.
The user would be able to edit and/or delete the message depending on the settings you established previously.
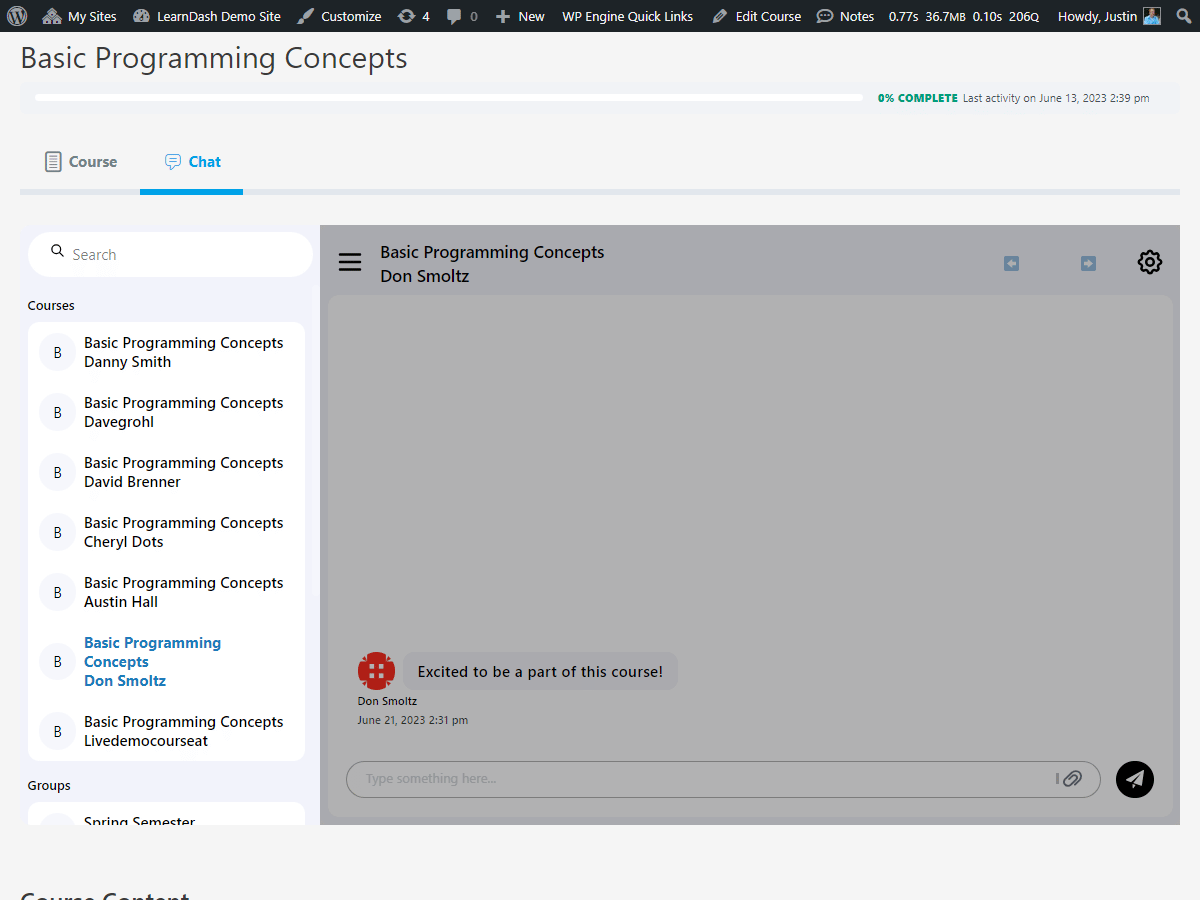
Below is what the LearnDash course instructor would see on their chat window.
As you can see, the course author can communicate with anyone enrolled in the LearnDash course.
When the Restrict chat setting is set to No, this is what the user would see:
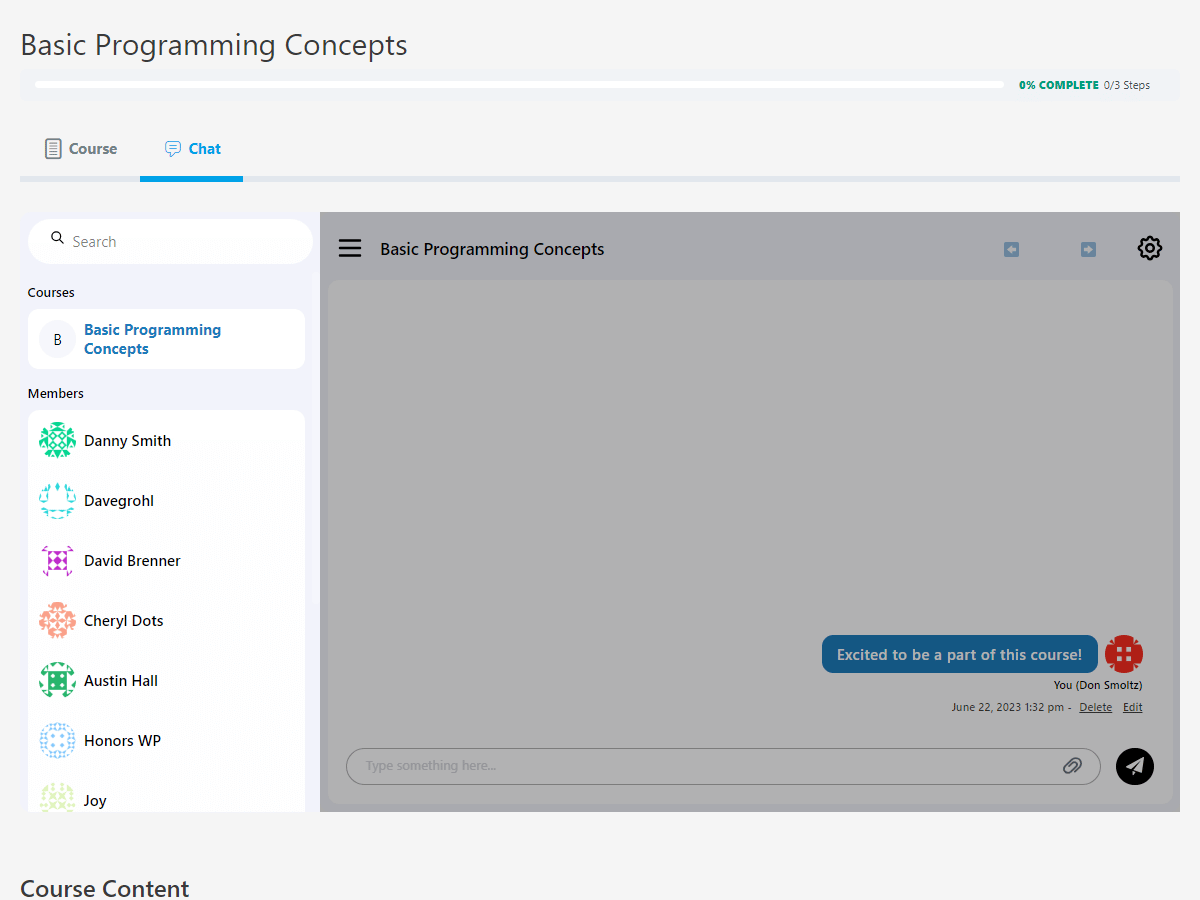
The user can now chat via the LearnDash course and message individual users who are also enrolled in the LearnDash course.
You can also utilize our Messaging plugin in LearnDash Focus Mode and hide yourself from the chat list if you don’t want to be seen.
Chat via LearnDash Groups #
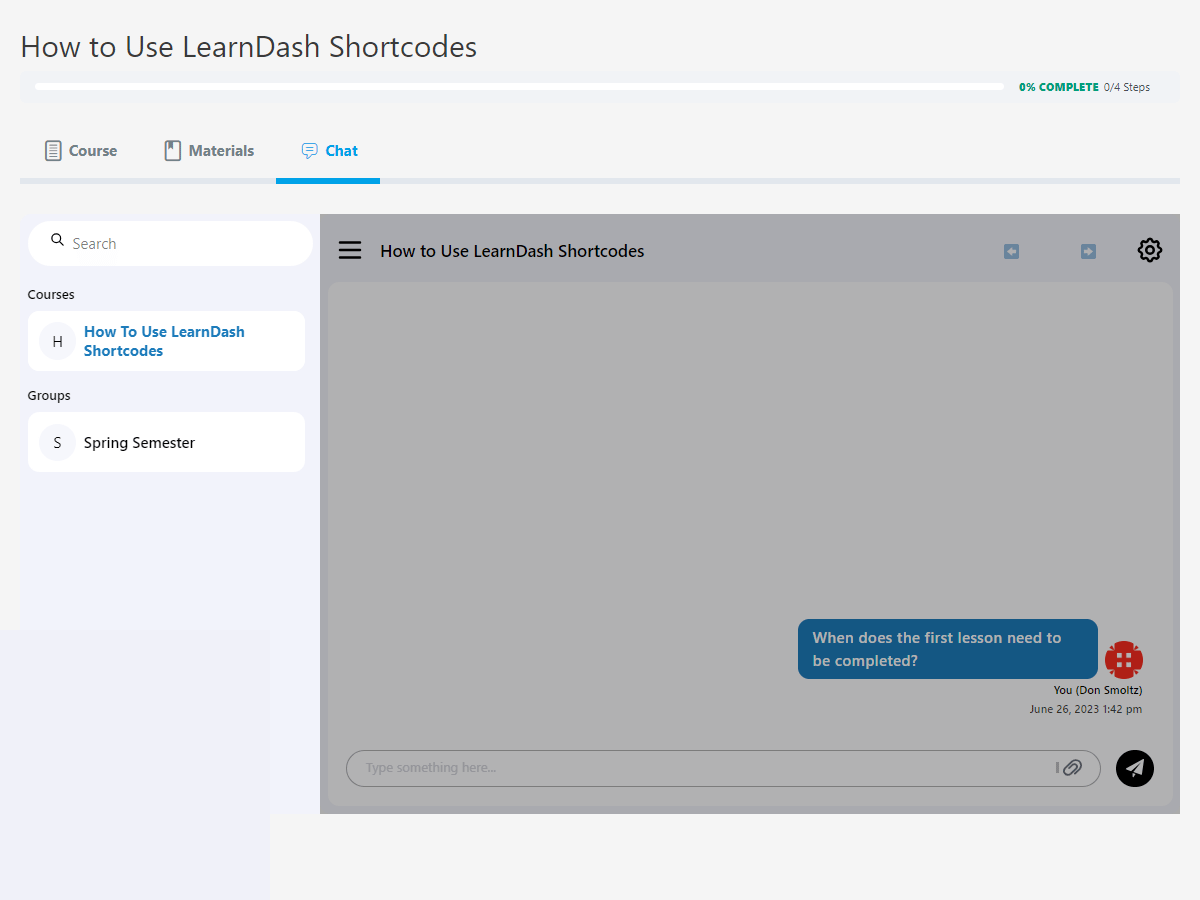
Now, let’s say you’re a LearnDash user enrolled in a LearnDash group called Spring Semester. Those enrolled via the group have access to the LearnDash courses, Basic Programming Concepts, and How to Use LearnDash Shortcodes.
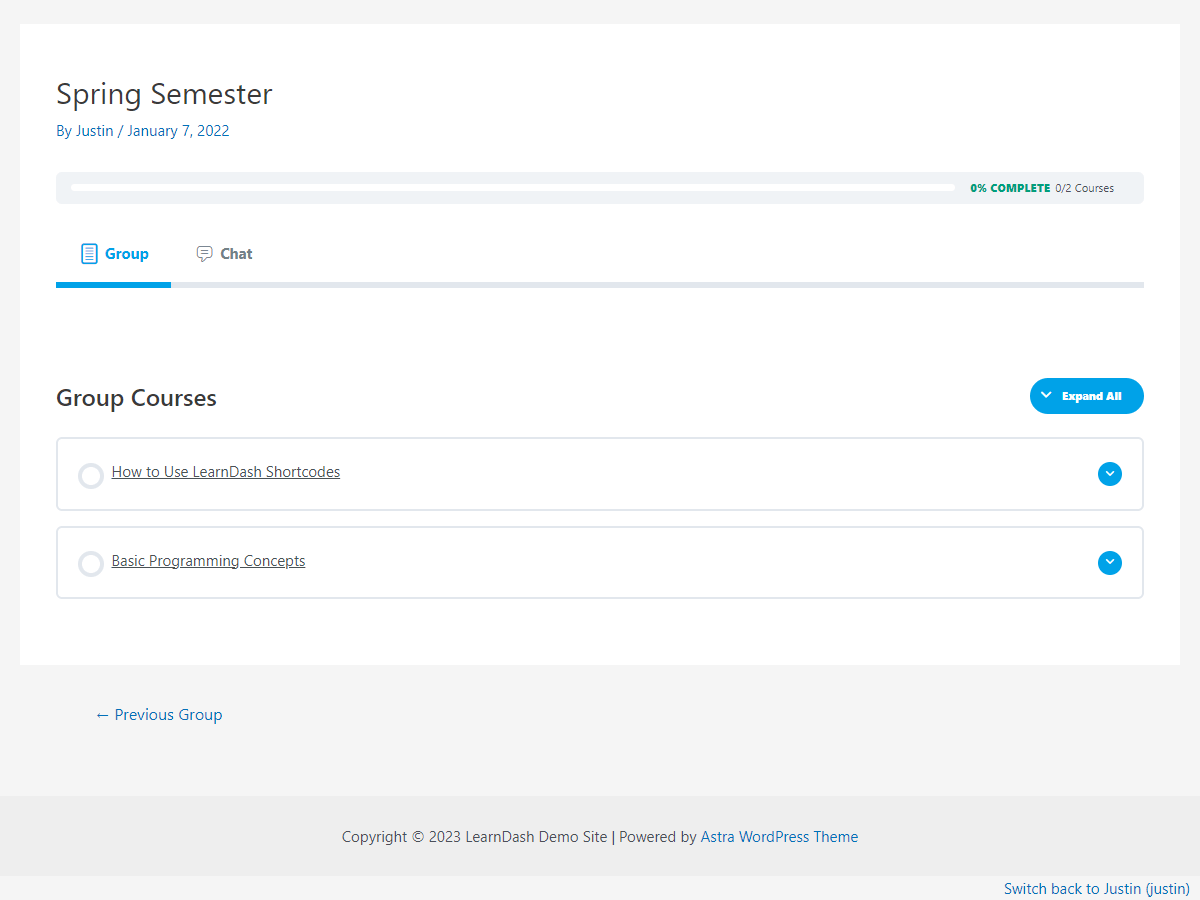
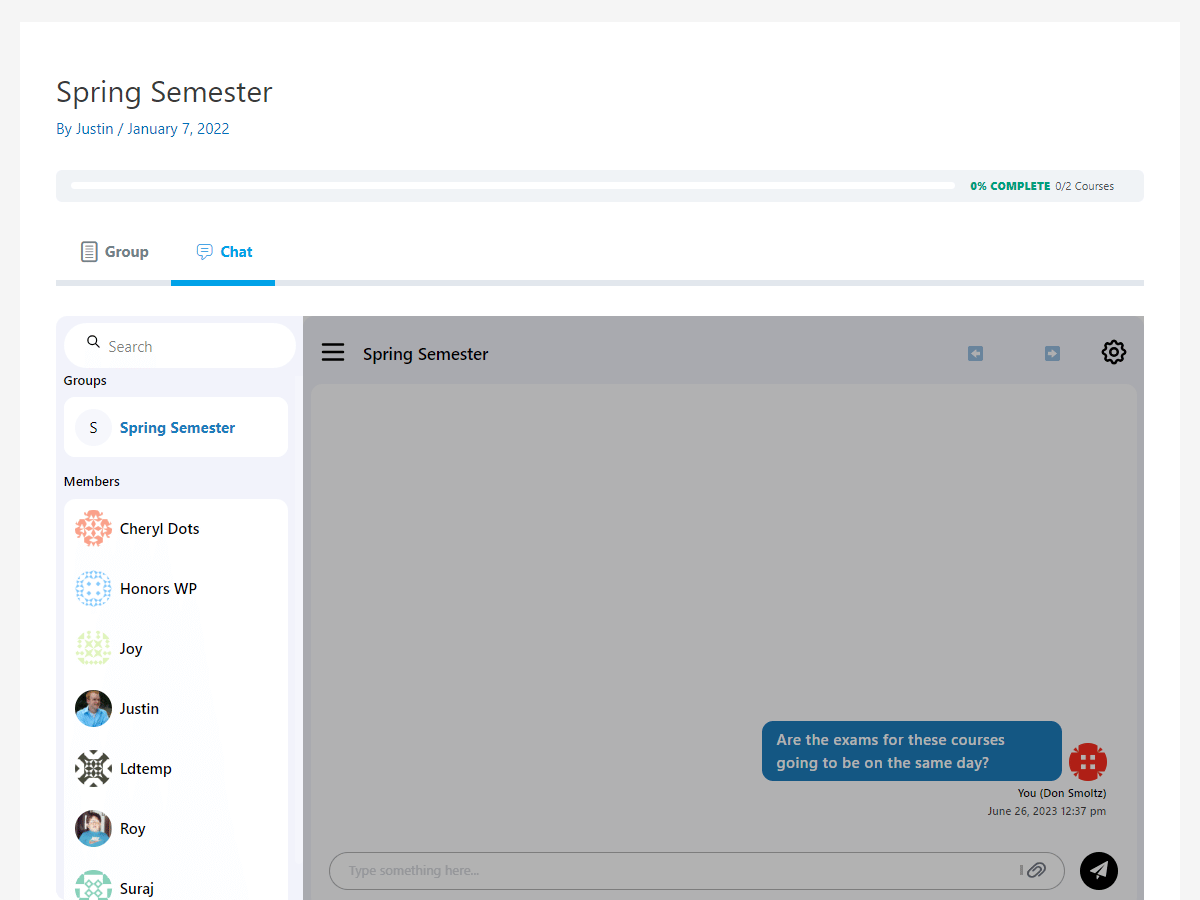
On the LearnDash group page, you can see the LearnDash courses the user is enrolled in and the chat tab at the top. The user is able to communicate with any member enrolled in the group because the Restrict chat setting is not enabled.
If the user navigates to the LearnDash course they are enrolled in, they are able to communicate via the course and also can communicate via the LearnDash group they are enrolled in.
Here, the Restrict chat setting is enabled and the user can only chat via the LearnDash course and LearnDash group, where only the course author or WordPress admin can respond to them.
The documentation article, Using Messaging for LearnDash with Groups explains how to best leverage the plugin with LearnDash groups.
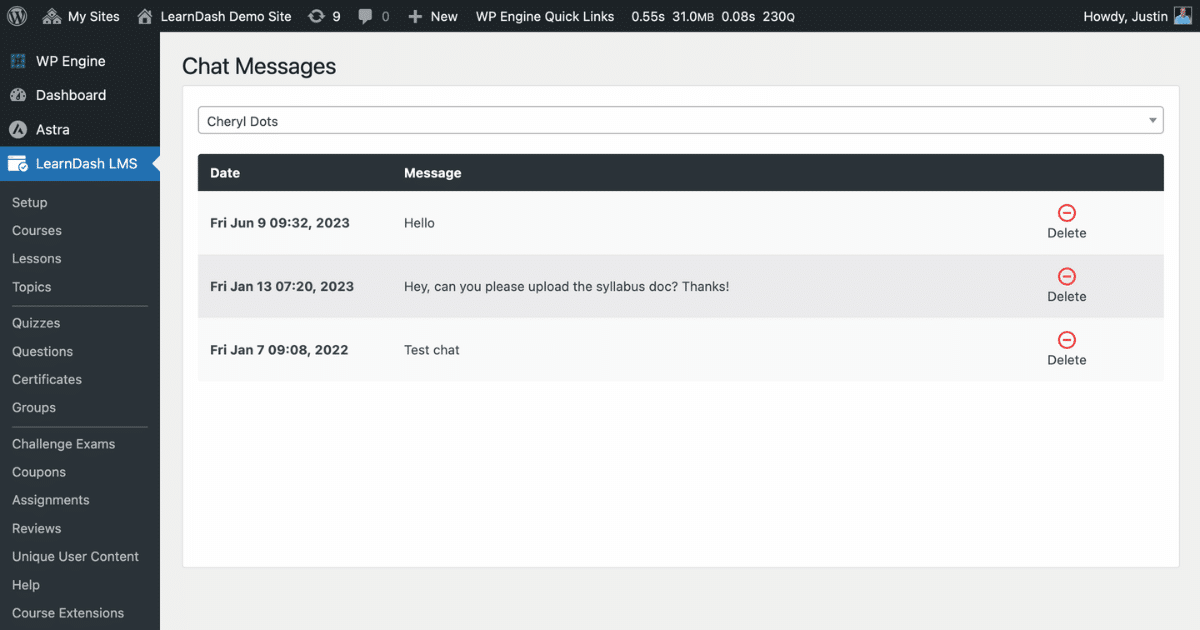
Monitoring LearnDash Messages as an Admin #
WordPress admins can monitor their learner’s chat messages from the backend of their LearnDash site.
To review chat messages as an admin, navigate to LearnDash LMS > Chat Messages.
To search for a user’s messages, type their name in the search box and select them from the drop-down menu.